From Vibe Coding to Hardware: Building a Wearable Badge with AI
September 28, 2026
We’ve seen plenty of software built with AI through what people now call vibe coding: automation tools, digital products, websites and entire applications.
What we see less often is vibe coding crossing from the digital world into something physical.
That was the experiment I recently set myself: could I use AI to help turn an idea in my head into a working electronic product I could actually hold and wear?
The idea came from something that had been sitting in the back of my mind for a while, helped along by seeing similar electronic badges appearing in AliExpress ads.
I’ve attended plenty of trade shows, networking events and business clubs. Most of the time, you’re given some variation of the same thing: a printed name tag in a plastic holder, a branded lanyard, or a sticker that inevitably starts peeling off your jacket halfway through the event.
I started wondering: what if a name badge could do more?
Not just tell someone who you are, but show what you do. It could display different content, show your work, provide a QR code and make it easier for people to connect without exchanging business cards or having that slightly awkward moment where someone has to decide who pulls out their LinkedIn QR code first.
That became the start of my electronic badge experiment.
The brief
I gave myself a fairly simple product brief:
- It must have a screen.
- It must be small enough to work as a badge.
- If it is light enough, it should be wearable like a pin.
- Content should be easy to update.
- It should support multiple screens or slides.
- It should display scannable QR codes.
- It should have a rechargeable battery rather than needing to stay plugged in.
- Ideally, it should eventually be updateable wirelessly from a phone.
- A MagSafe-style magnet would be useful so it could also become a small desktop display.
- The enclosure should be 3D printed.
- Total component cost should stay around A$50 or less.
From there, I started working with ChatGPT to plan the hardware.
It helped me identify the components I needed, including an ESP32-based board, a lithium-polymer battery and the power components required to run everything correctly.
I could also upload photos and specifications of the board and ask how the components should be wired together.
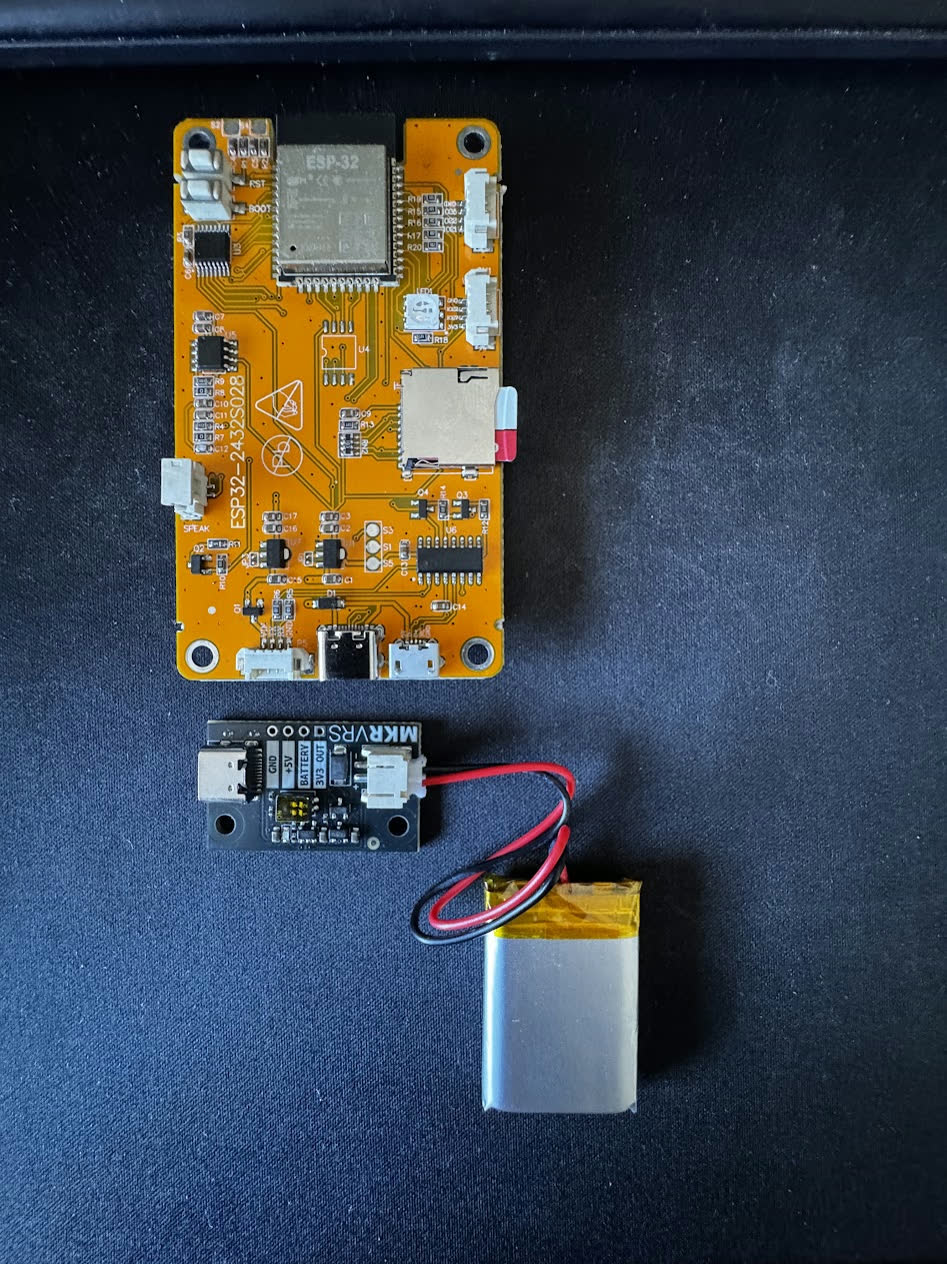
The first hardware components: ESP32 display board, battery and supporting power electronics.
That was particularly useful because a simple wiring mistake can destroy a component, or worse, the board itself.
The remaining variable was my soldering.
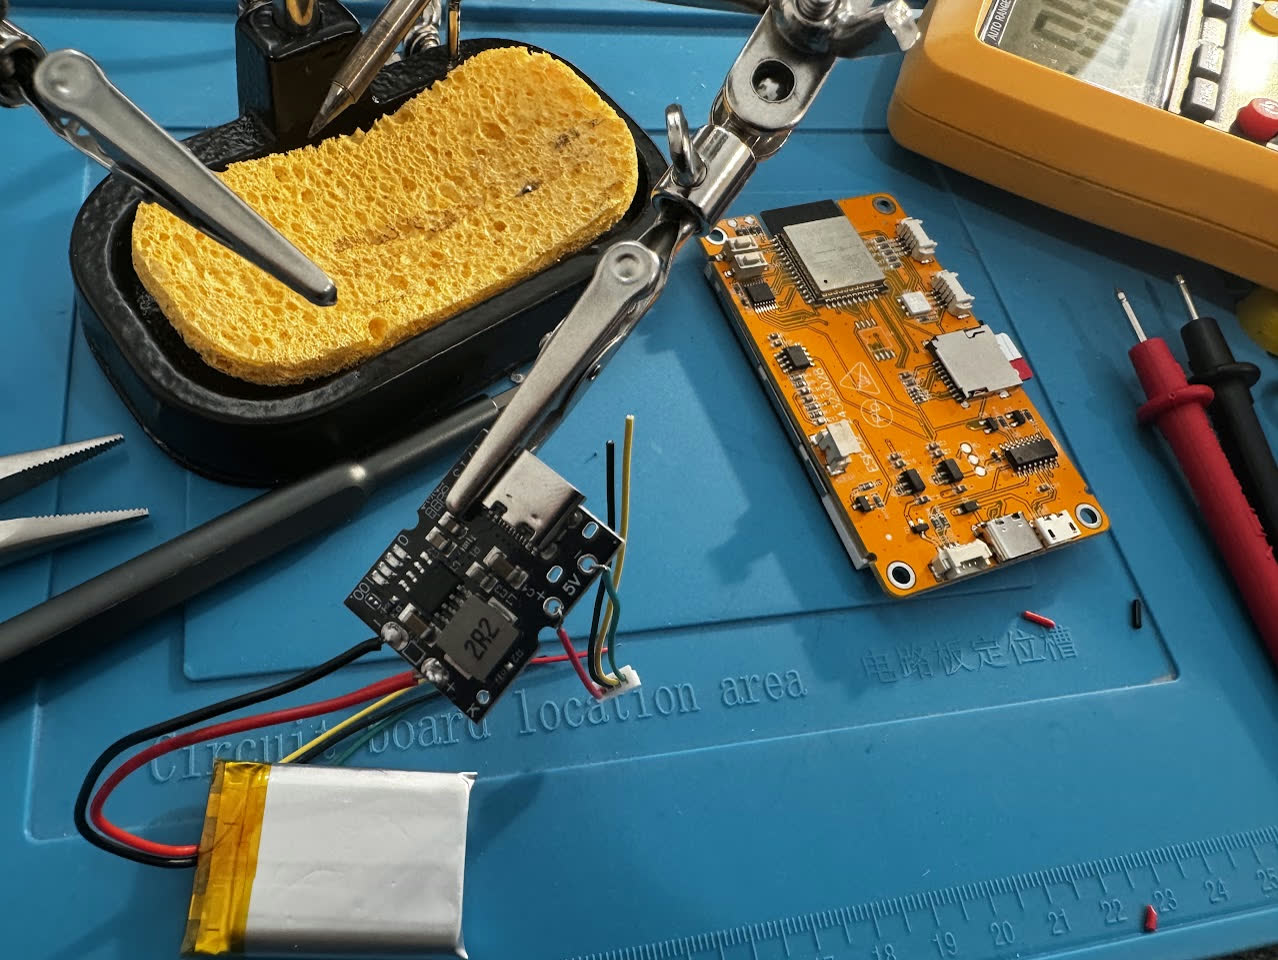
Soldering such small components was challenging.
Building the hardware and software at the same time
While soldering and connecting the electronics, I also started working on the software.
I created a Product Requirements Document and handed it over to Cursor, using multiple coding agents to build the software that would eventually run on the device.
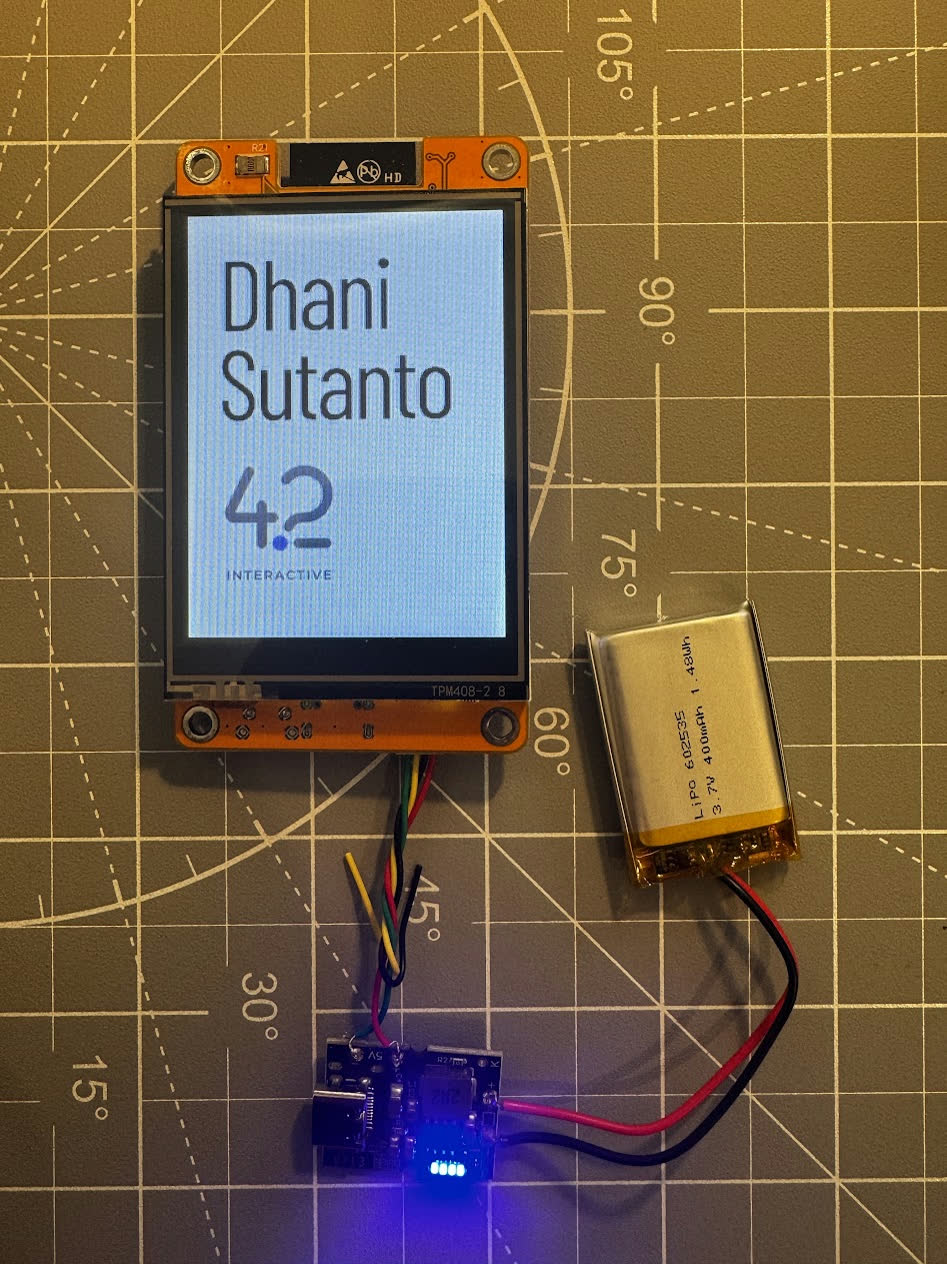
Hardware assembly happening alongside software development.
This is where the project started to feel different from normal software development.
I wasn’t following a tutorial from beginning to end. I was moving between electronics, software, industrial design and fabrication, with AI helping fill the gaps between areas where I had experience and areas where I had much less.
Designing the interface in Figma
I designed the badge interface in Figma and used Figma MCP to give the coding agents access to the design.
From that, the agents created the screens and translated the visual design into something that could run on the ESP32.
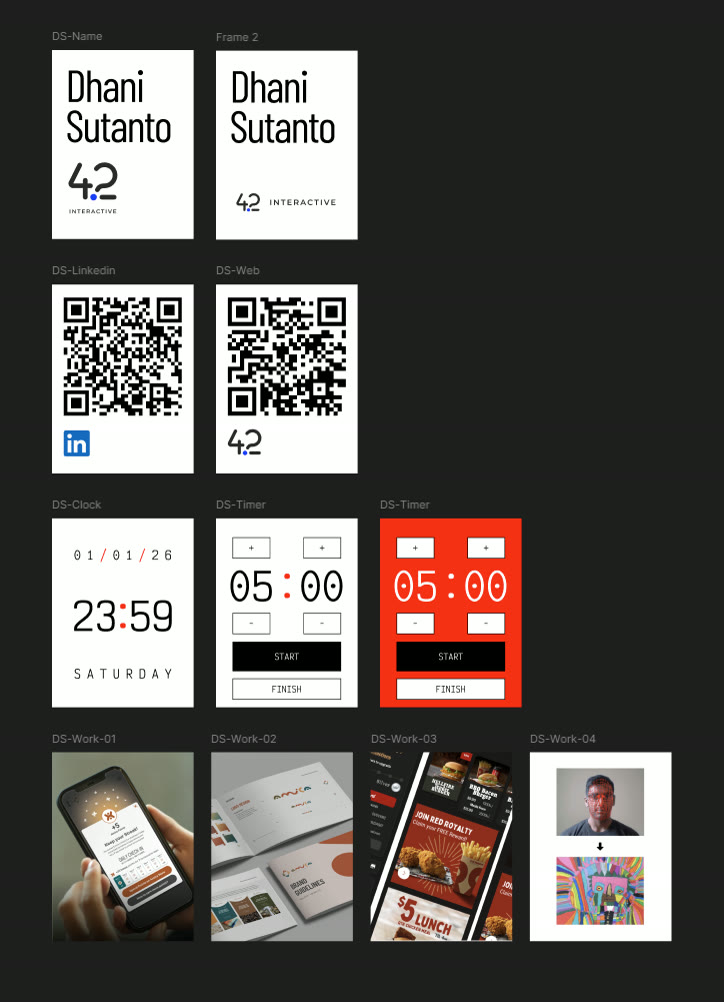
The badge UI system in Figma: identity screens, QR codes, clock, timer and portfolio content.
The initial result was surprisingly close. Most of the screens and functionality were generated in one pass.
I still had to refine the implementation and make sure the layouts were pixel-perfect, but this exposed one of the interesting limitations of using AI for embedded hardware development:
The AI is effectively blind once the interface leaves the browser.
With a web application, an agent can launch the application, take a screenshot, compare it against the intended design and iterate.
With this device, the agent cannot directly see what is actually appearing on the physical display.
I became the feedback loop.
The AI could write the code, but I still had to look at the screen, identify spacing, scaling or rendering problems, and describe what needed to change.
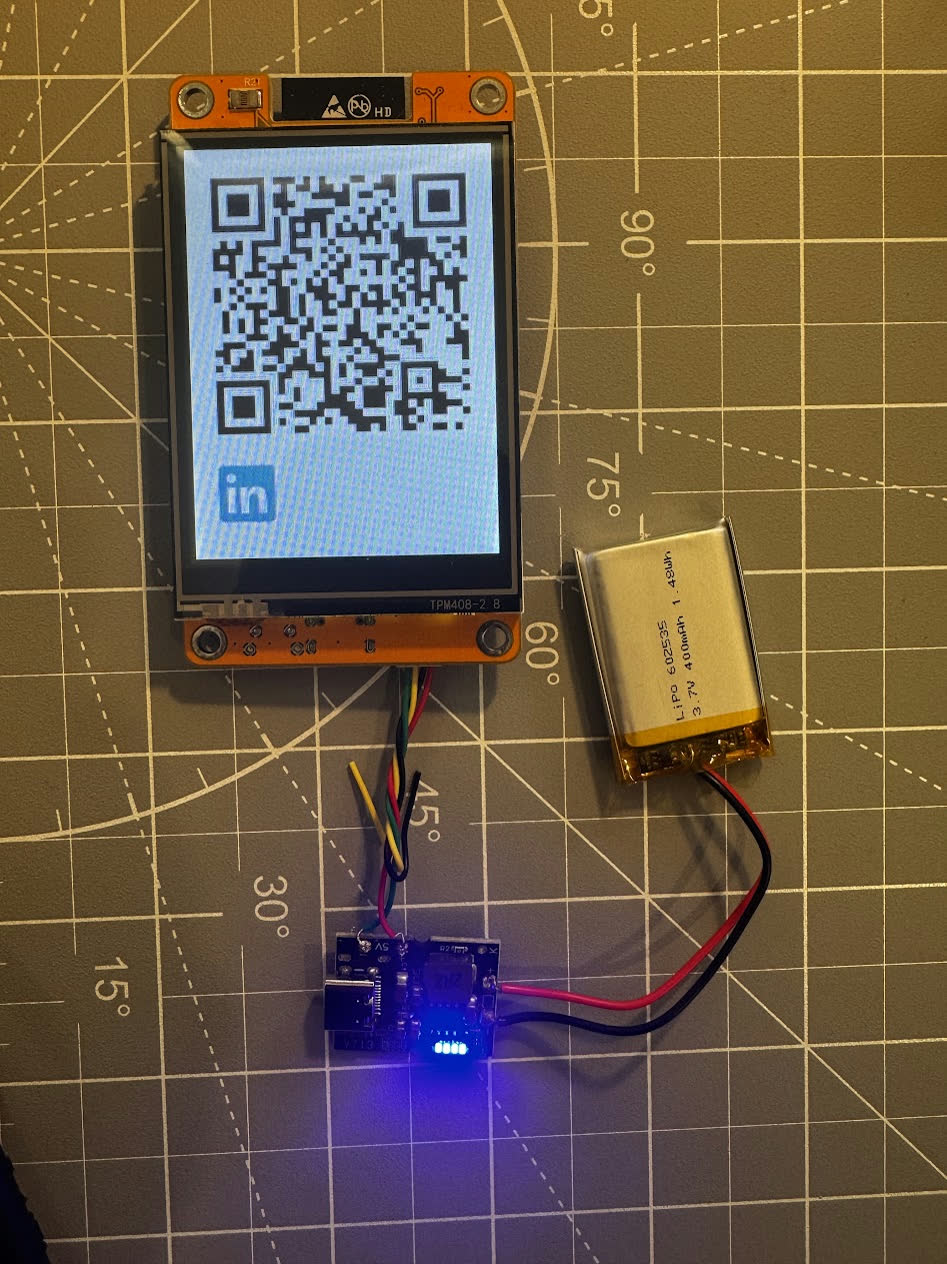
Testing the QR code interface while finalising the enclosure dimensions.
From electronics to a product
Once the electronics and software were working, the next challenge was packaging everything into something that actually felt like a product.
That meant designing an enclosure with accurate measurements for the board, battery, wiring, charging port and mounting points.
I used Fusion 360 to model the case and iterated on the dimensions until everything aligned correctly.
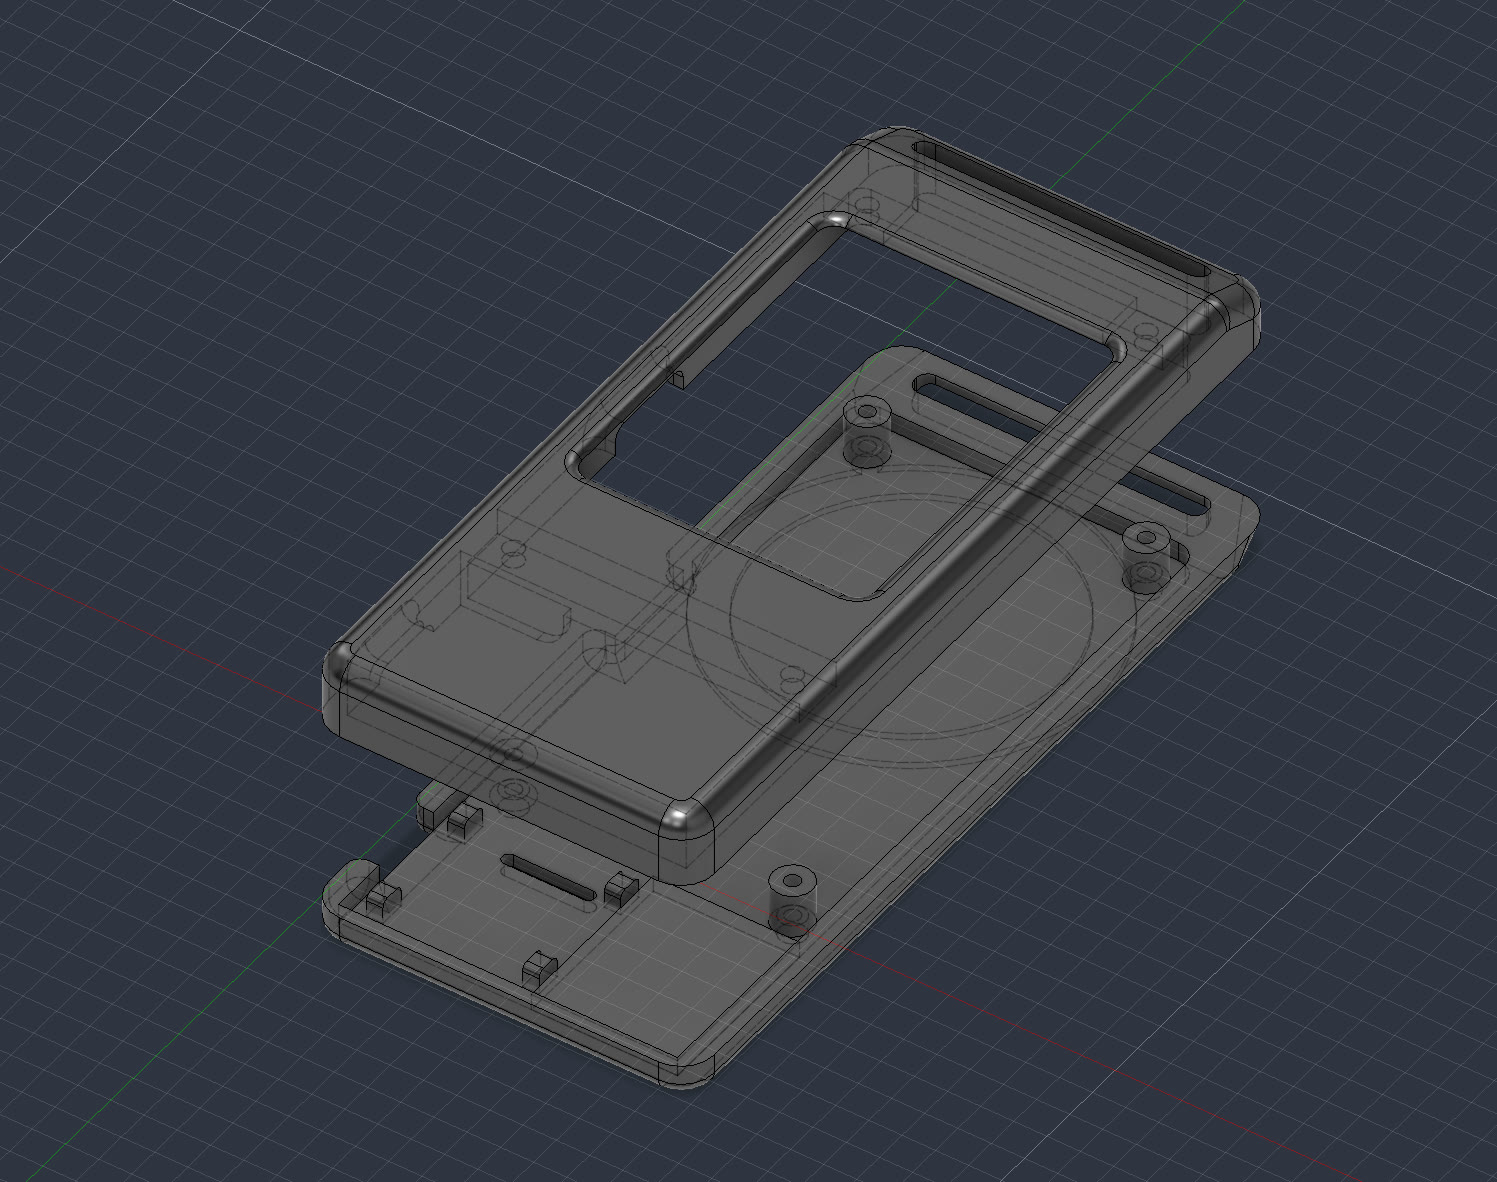
The enclosure model in Fusion 360 before printing.
Then it went to the 3D printer. And, predictably, it did not work perfectly on the first attempt. There were multiple prints, small dimensional changes, test fits and another round of printing before all of the parts finally came together.
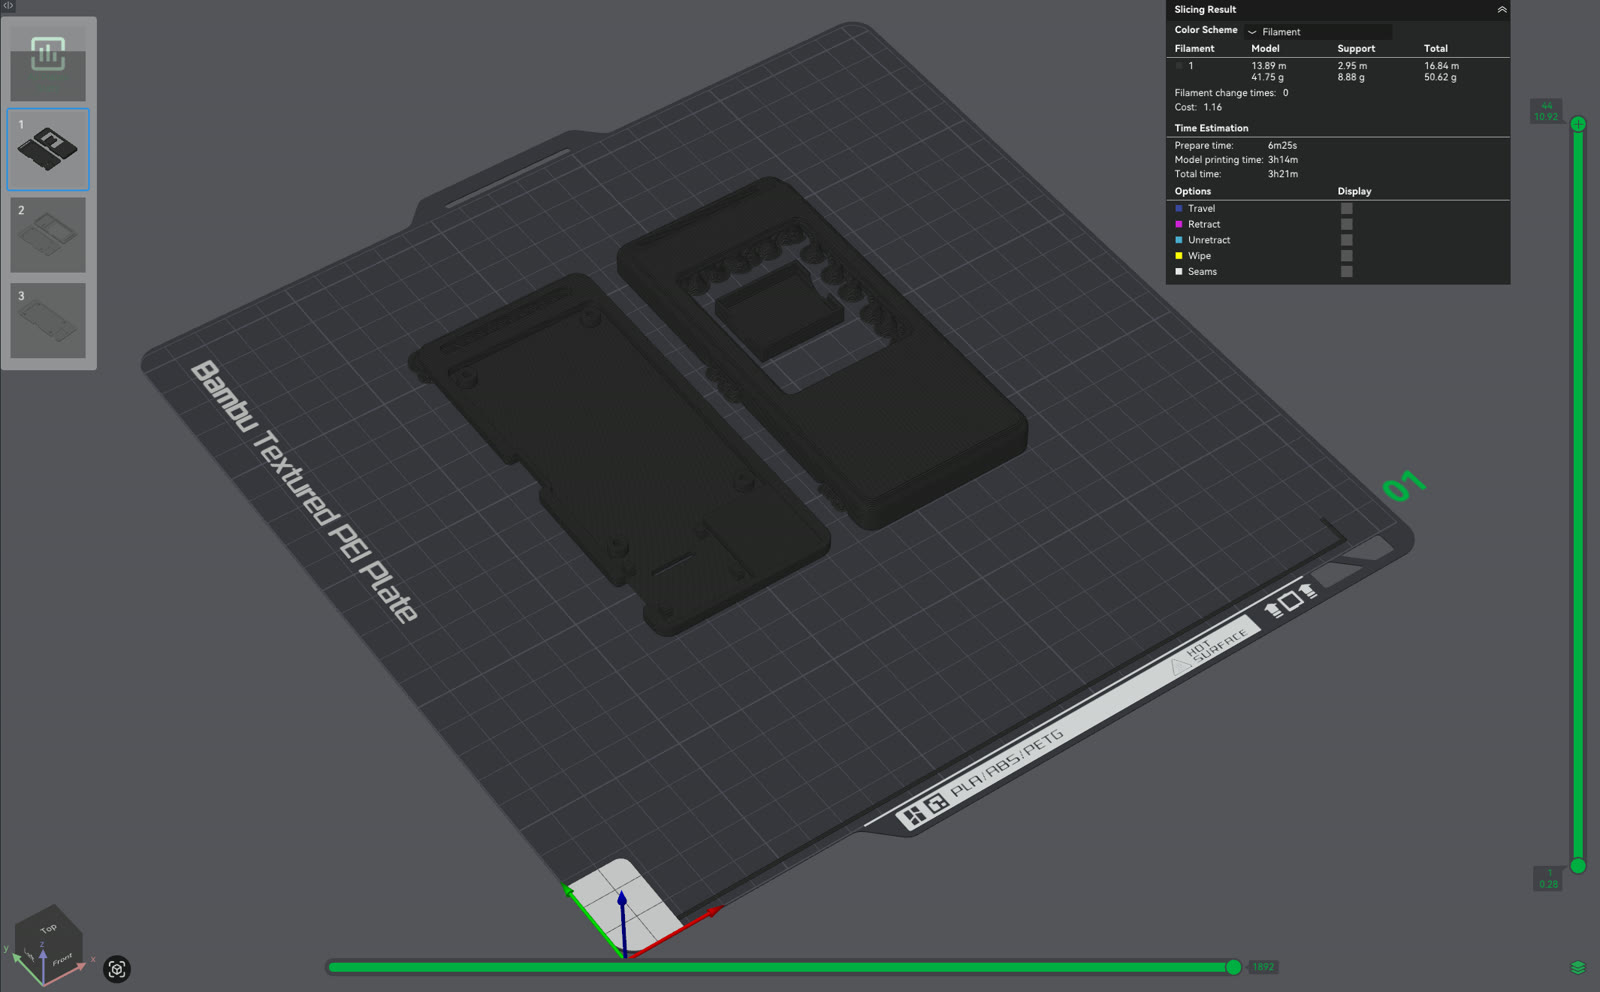
Preparing another enclosure iteration for 3D printing.
That iterative process was probably the most physical part of the project. In software, changing a few pixels can take seconds. With fabrication, a tiny measurement error might mean waiting a few hours for a new print.
When the digital becomes physical
Eventually, everything fitted. The board, battery, electronics and enclosure became one finished object.
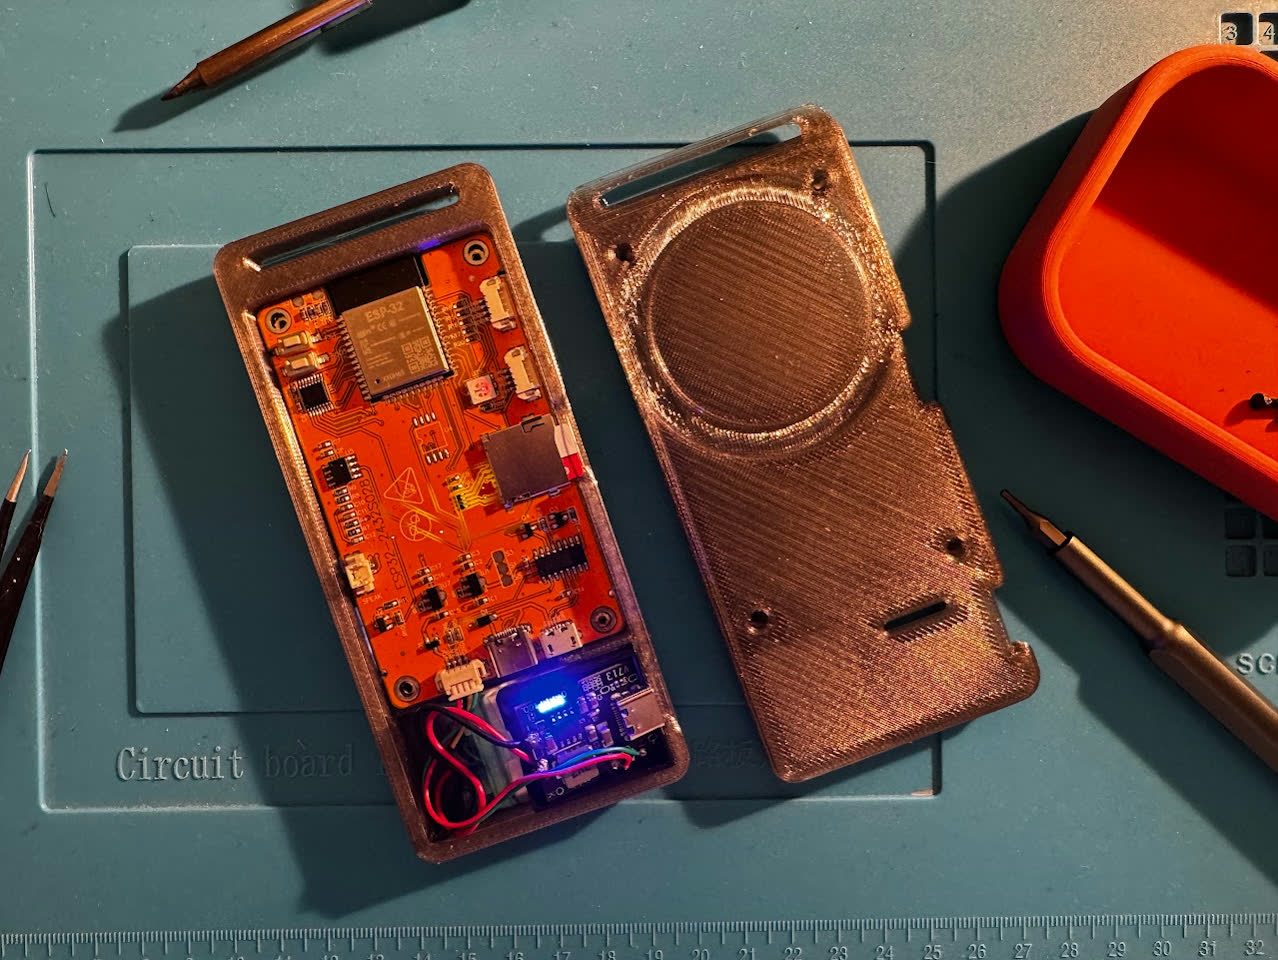
The completed internal assembly before closing the enclosure.
This is the part of AI-assisted development I find most interesting.
AI helped with the planning, electronics, wiring, software architecture and implementation. It helped bridge several different disciplines and made it possible for me to move from an idea to a working physical prototype much faster than I would have been able to on my own.
A project like this would previously have required significantly more research and experimentation before I could even get started.
Instead, within a couple of weeks, something that originally existed only in my head had become something I could hold.
And wear.
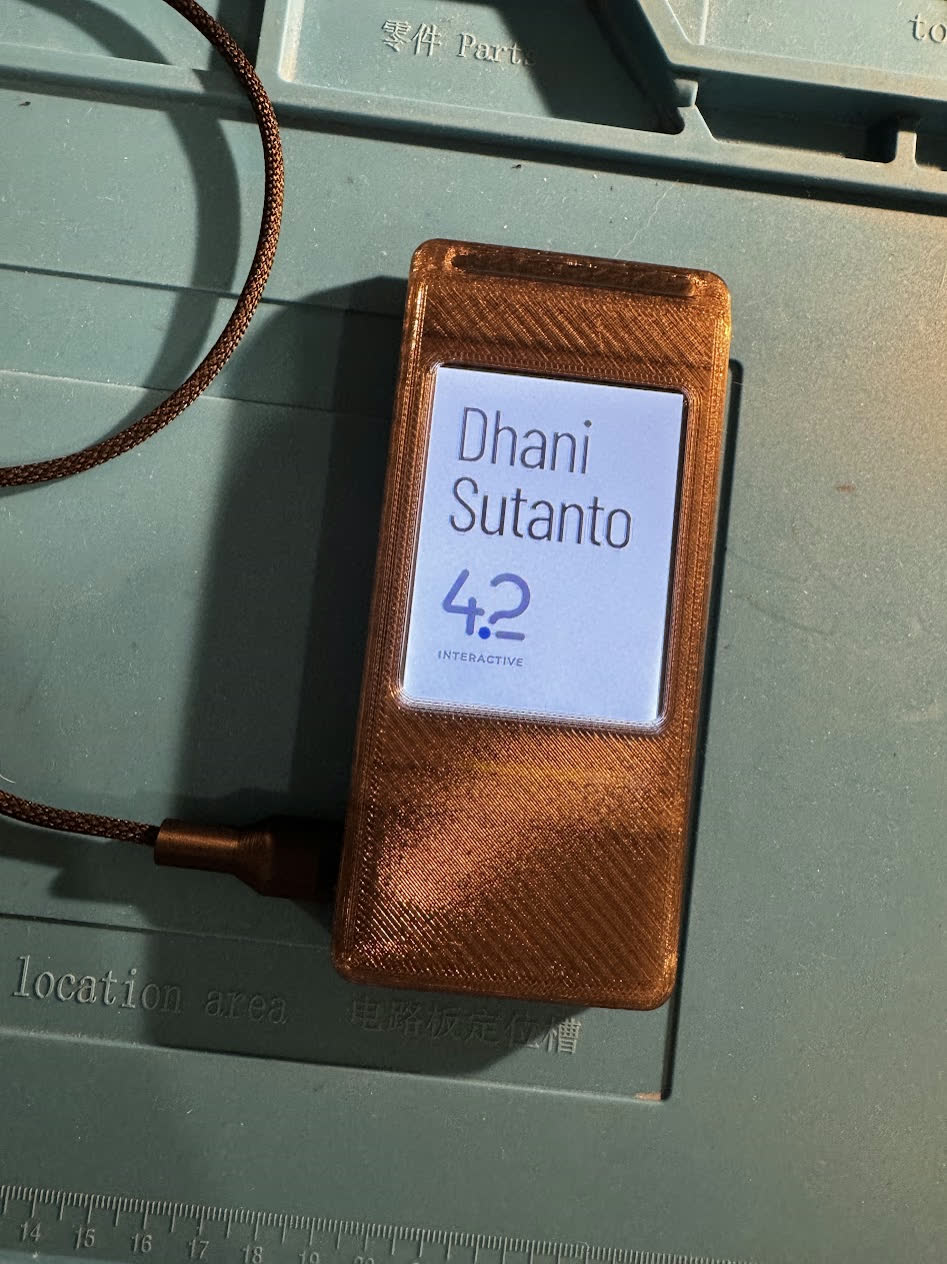
The finished electronic badge being charged with a USB-C cable.
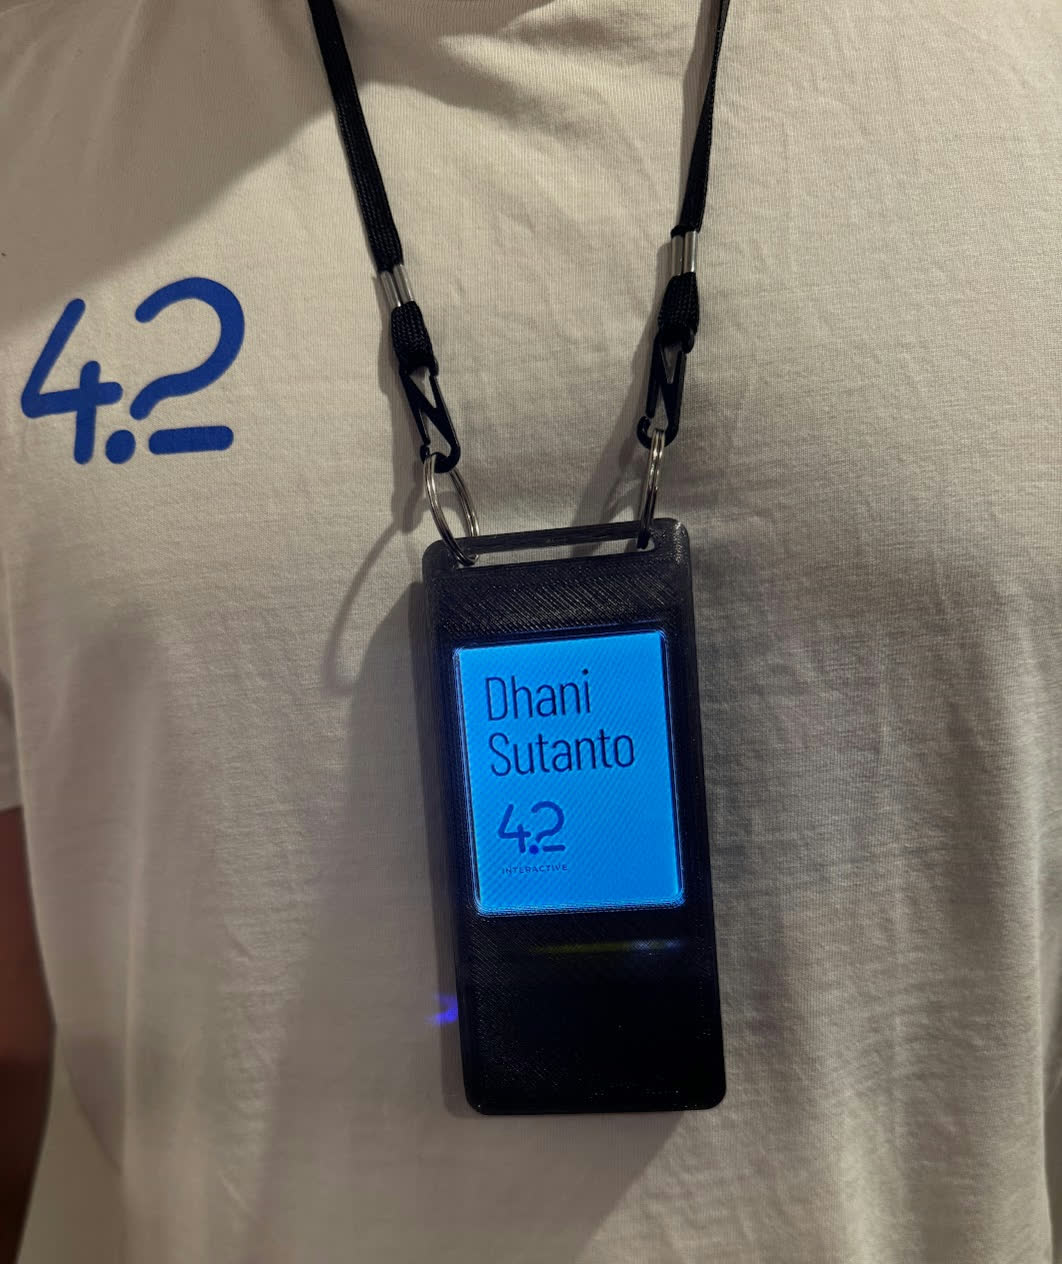
The badge in use as a wearable display.
The badge can display more than just a name. It can cycle through QR codes, portfolio work, branding, information and other content depending on the context.
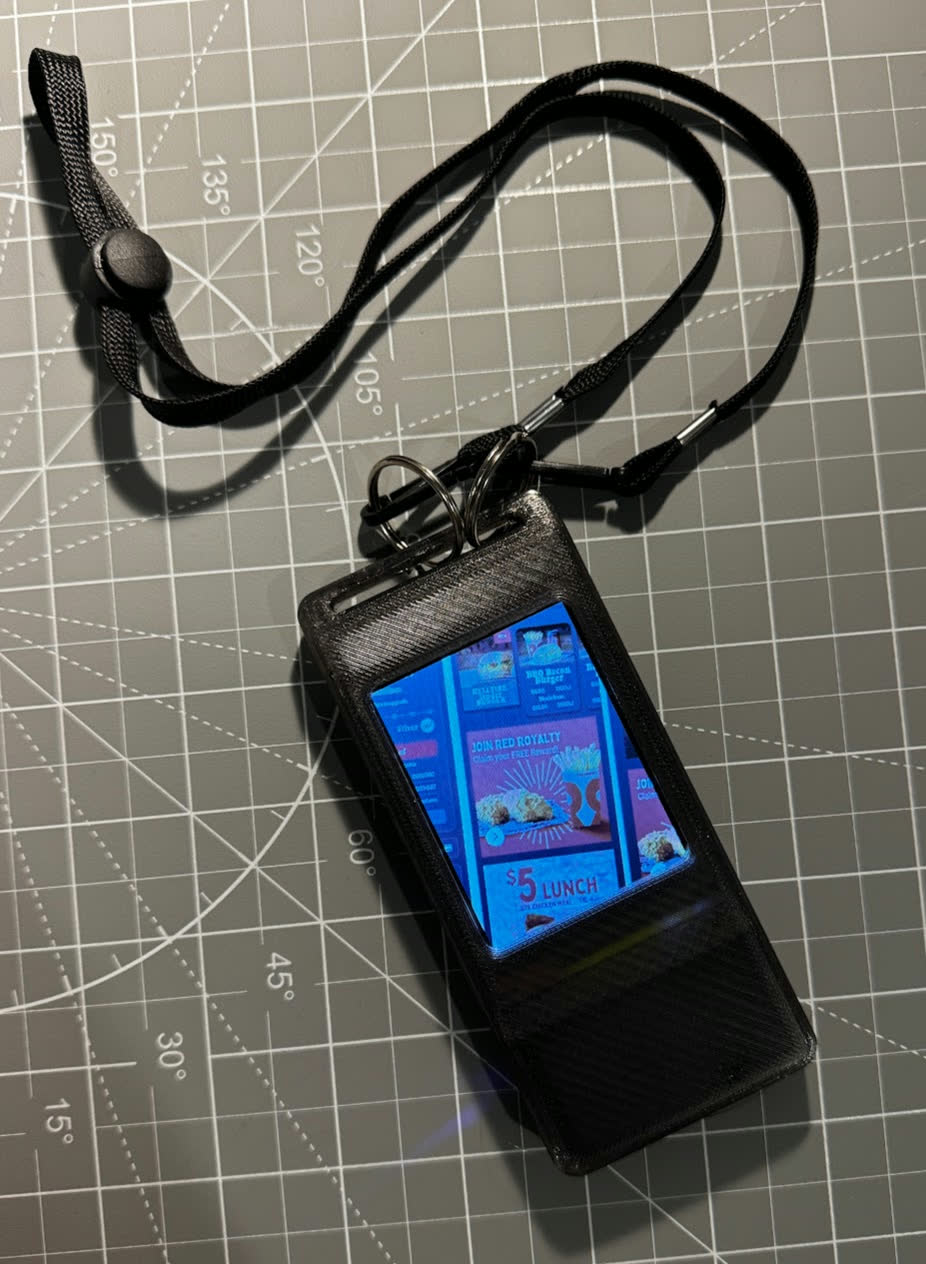
The badge displaying portfolio content rather than a traditional static name tag.
The bigger takeaway
The most useful outcome of this experiment was not really the badge itself. It was seeing how much the barrier between idea, software and physical product has changed.
Vibe coding is normally discussed as a faster way to create software. But once AI can help with electronics selection, wiring, embedded code, interface design, CAD workflows and troubleshooting, the same approach starts extending into physical products.
You still need judgement.
You still need to understand what you are trying to build.
You still need to test, measure, solder, print, break things and iterate.
But the distance between “I wonder if I could make this” and “this thing now exists” is getting much shorter.
That, to me, is where vibe coding becomes a lot more interesting.
Not just coding software. Vibing electronics.
Written by,
Dhani Sutanto
Creative Director / Technologist
42 Interactive Co-Founder